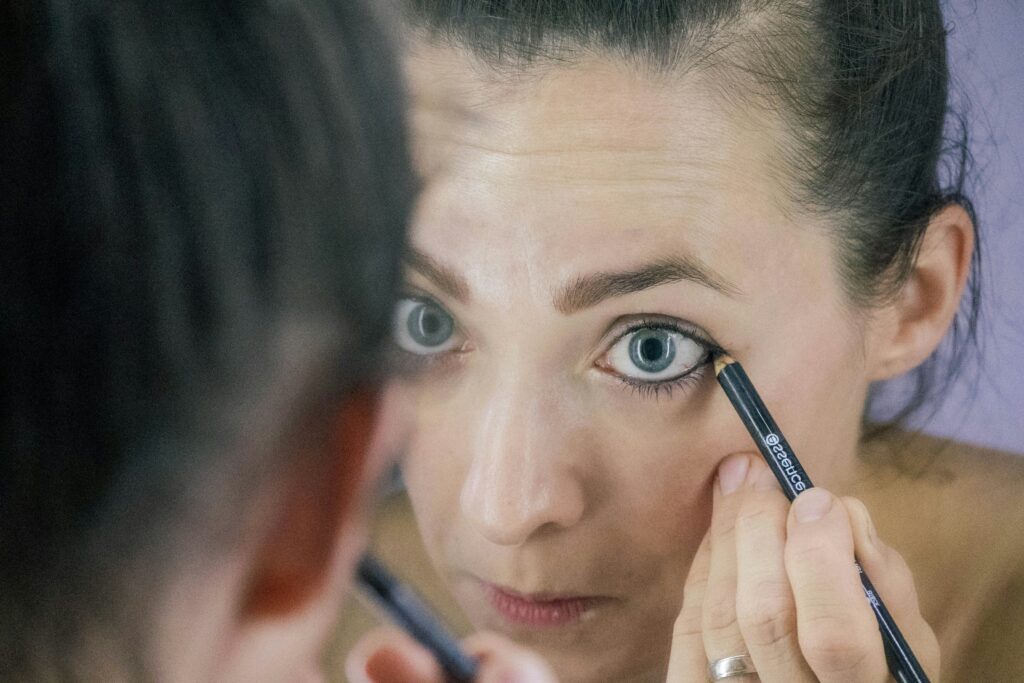
Why Lip Contouring Deserves Your Attention
Lip contouring isn’t just a passing trend—it’s a subtle technique that can redefine your overall look. Whether you want to enhance your features for a big night out or create a barely-there, everyday effect, mastering a few strategic moves can completely transform the appearance of your lips.
Small Technique, Big Results
- Even minor adjustments in shading can create the illusion of fuller, more balanced lips.
- Thoughtful contouring improves symmetry, highlights your cupid’s bow, and brings softness or structure where needed.
- Unlike fillers or more invasive treatments, this technique is flexible and can adapt to your mood, style, or season.
Benefits Go Beyond Glam
While lip contouring is often associated with bold makeup looks, its power lies in its versatility.
- Ideal for creating subtle definition when wearing minimal makeup
- Can be tailored to suit daytime, professional, or ‘no-makeup’ looks
- Works well across age groups and skin tones
Shape, Volume & Symmetry—In Your Hands
Lip contouring puts the control in your hands to:
- Make thinner lips appear fuller without overlining dramatically
- Soften uneven edges or asymmetry often missed by regular lip color application
- Lift the appearance of downturned lips for a more refreshed expression
Whether you’re new to lip enhancement or fine-tuning your go-to look, understanding the fundamentals of contouring is your secret weapon for consistent, polished results.
Tools You Actually Need
Lip contouring doesn’t require a drawer full of products—you just need a few key tools and the right techniques. With smart choices, you can build precise definition, enhance volume, and create a polished look, whether you’re going full glam or aiming for natural beauty.
Lip Contouring Essentials
To achieve clean, sculpted contours, you’ll want to keep these basics on hand:
- Lip liner – for defining and shaping the lips
- Lipstick – matte, satin, or cream depending on your desired finish
- Lip brush or finger – for blending and softening edges
- Optional: Highlighter or gloss – for adding volume to the center and cupid’s bow
Product Finishes: Matte vs. Satin
Different finishes can completely shift the result of your contour. The key is knowing when and why to use each:
- Matte Products:
- Offer long-lasting wear and better precision
- Ideal for creating crisp edges and defined shapes
- Best for bold looks or when you need makeup to last all day
- Satin or Cream Products:
- Provide a softer, more natural finish
- Easier to blend — perfect for beginners or subtle daytime looks
- Work well with a “no-makeup” aesthetic
Consider mixing both for depth: use matte lipliner for structure, satin lipstick for comfort and dimensional color.
Choosing the Right Tones
Matching your lip products to your natural coloring is essential—especially when contouring. Consider these tips to find your perfect shades:
- Fair skin tones:
- Go for nude pinks, soft peaches, or rosy browns
- Avoid overly dark liners that create stark contrast
- Medium to olive skin tones:
- Warm mauves, caramel tones, and mid-range reds enhance definition
- Deep liners can work well when blended smoothly
- Deep skin tones:
- Rich berries, cocoa shades, and bold plums add structure
- Pair liners in a similar depth for a natural gradient effect
Whatever your tone, always test shades on your lips—not your hand—for the most accurate match.
Step 1: Prep Like a Pro Lip contouring starts before the pigment hits your skin. First rule? Don’t skip prep. Flaky, dry lips kill your definition and make product settle in all the wrong places. Start by gently exfoliating—a warm washcloth, sugar scrub, or even a soft toothbrush gets the job done. You’re not sanding drywall, so go easy.
Once you’ve got a smooth canvas, hydrate. A thin layer of balm is enough. Let it soak in while you’re doing your base makeup or prepping other areas. This keeps lips supple without slipping. Think of it as priming a wall before paint—it seals the deal and makes everything stick better.
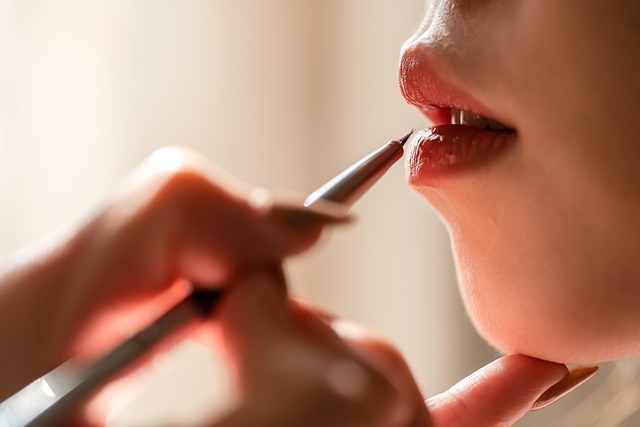
Step 2: Define the Edges Now you’re mapping the territory. Grab a lip liner that matches your lipstick or goes one shade darker. The goal isn’t to draw a new mouth—it’s to guide shape and balance. Start at the cupid’s bow, then sketch down toward the corners. Follow your natural line closely, unless you’re correcting something like a droop or asymmetry.
If you’re playing with fullness, overline slightly—but only at the center of the top and bottom lips. Go rogue on the sides and it starts looking cartoonish. Steady hand. Light pressure. Minimal strokes. You’re laying a framework, not filling in a coloring book.
Step 3: Shade Smartly Here’s where depth shows up. Use a darker shade—liner or cream product—and lightly deepen the outer corners. Blend it inward with a brush or finger so it softens gradually. This subtle contrast fakes roundness and creates the illusion of volume.
Harsh lines ruin the effect. Buff the edges into your base liner so transitions feel natural. You don’t want obvious borders. Think of light-shadow interplay, not stage makeup. The best contouring doesn’t scream; it whispers.
Step 4: Add the Volume Trick Time for the illusion of a plump finish. Take a lighter shade or gloss and tap it onto the center of your lips—top and bottom. This contrast tricks the light and makes lips look fuller without piling on product.
Want an extra pop? Add a tiny dab of highlighter to the cupid’s bow. It catches light and adds subtle lift to your lip line. Optional, but effective.
Do less, blend more. That’s the rule. Lip contouring is a finesse game—not a full-saturation situation.
Contouring by Lip Shape
Understanding your natural lip shape is key to making lip contouring work for you. Different techniques bring out the best in thinner lips, fuller lips, and asymmetrical shapes. Here’s how to tailor your approach:
For Thinner Lips
If you want to create the illusion of fuller lips without overlining in an obvious way:
- Use a neutral-toned lip liner just outside your natural lip line
- Focus on the cupid’s bow and lower lip center to add height and depth
- Avoid dark, matte shades, as they can make lips look smaller
- Blend well to keep the look subtle and natural
For Full Lips
Already have full lips? The goal becomes about definition, not exaggeration:
- Stick to your natural lip line—or slightly inside it for a tighter look
- Use medium or soft shades to avoid overpowering the rest of your face
- Skip heavy glosses and opt for satin finishes that flatter fullness
- Define edges softly to enhance shape without adding bulk
For Asymmetrical Lips
No lips are perfectly symmetrical, and that’s completely normal. Lip contouring can help even things out cleverly:
- Adjust with liner, focusing on the side that needs slight reshaping
- Balance both sides by overlining minimally where necessary
- Keep symmetry as the goal, not perfection—small tweaks go a long way
- Apply with a steady hand and check progress with your face relaxed
Use these techniques as a guide, but always adapt based on your unique features. Practice makes precision.
Product Recommendations That Work
Not every lip product earns a spot in your daily routine. The key is finding formulas that blend effortlessly, stay put, and don’t require a chemistry degree to apply.
Let’s start with the workhorses. For liners, NYX Slim Lip Pencils are cheap, creamy, and reliable—perfect for everyday wear without draining your wallet. If you want a liner that feels like silk and lasts through a full day (plus coffee and lunch), consider MAC’s Lip Pencil line. It’s an investment, but it’s pro-grade and built to perform.
On the lipstick front, Maybelline’s SuperStay Matte Ink delivers solid pigment and lock-in color at a drugstore price. It’s not weightless, but it won’t ghost you mid-day. For luxury picks, Charlotte Tilbury’s Matte Revolution lipsticks offer blendability, comfort, and a finish that feels elevated. Worth it if you’re getting camera-ready often.
When deciding what to splurge on, prioritize longevity and wear. Liner and lipstick are your anchors—it’s worth going higher-end for shades you use all the time. Save on glosses or trendy colors you only reach for now and again. The goal: build a small but mighty arsenal, not an overflowing drawer of regret.
Pro Tips That Save Time and Headaches
Mistakes happen—even pros smudge a line or overdraw. The key is not panicking. Grab a flat brush or cotton swab dipped in a bit of micellar water or concealer. Gently clean the edges without wiping off your whole face. You can also sharpen the line with a tiny bit of foundation along the lip border—like an eraser, but smarter.
To keep your contouring locked through meals, focus on layers. Start with a long-wear lip liner and use it not just to outline, but to fill in the lips as a base. Blot, apply lipstick, blot again, then add a second, thinner coat. Optional: a soft dusting of translucent powder through a tissue for extra insurance if you’re wearing matte tones.
Now, for the no-reapply hack: choose a liner close to your lip tone and sketch just a shadow beneath your lower lip line and slightly above the cupid’s bow—not on the lips, but on the skin. This subtle contour stays put, even when your lip product wears off, keeping definition without touchups. It’s low-effort but makes a big difference.
Lip Contouring for the “No-Makeup” Look
Nailing the barely-there lip contour isn’t about skipping steps—it’s about executing them with precision and restraint. You’re still contouring; you’re just doing it so cleanly that most people won’t know it. Instead of dramatic overlining or high-gloss finishes, the technique hinges on subtle tweaks: a soft pencil just one shade darker than your natural lips, a neutral lipstick that blends seamlessly, and minimal contrast between liner and fill color.
Skip the sharp edges. Blend with a fingertip or brush to blur lines into a soft-focus finish. Stick with matte or satin products that mimic the natural texture of lips. High-shine or shimmer draws attention—fine if that’s the goal, but for a no-makeup vibe, it’s best left on the shelf.
Stick to earth tones, rosewoods, and muted taupes that don’t announce themselves. You’re not hiding—you’re refining. A light press of translucent powder over the finished look can tone it down even more.
For more insider tricks, check out Makeup Tutorials for Achieving a Natural Look.
Final Thoughts
Lip contouring isn’t plastic surgery in a pencil—it’s a tool. A simple, effective one that can emphasize what you love about your face without rewriting it. The goal isn’t to mask your features, but to sharpen them. To own what’s already there and make it work a little harder for you.
Once you understand the basics—liner placement, shading, finish—you get the freedom to experiment. You don’t need to follow every rule every time. Your lips, your look. Try softer edges one day, go bold the next. It’s not about trends. It’s about knowing how to use technique to serve your mood, not the other way around.
Forget perfection. Go for intention. That’s how you contour with confidence.