Introduction: Why Eye Makeup Matters
Eye makeup isn’t just about color or creativity—it’s structural. It shapes the way your entire face is perceived. A sharp wing can lift the eyes, a soft blend can add intimacy, and the right contour can add architecture you didn’t know you had. Whether you’re pulling together a look for brunch or a runway shoot, your eyes do a lot of the heavy lifting.
The good news? You don’t need a dozen complicated tricks. Master a handful of core techniques—tightlining, crease work, strategic highlighting—and you suddenly have a toolkit that works across any style. Natural, bold, smoky, romantic, editorial—you name it, those basics scale every time.
One thing pros rarely overlook: balance. Strong eyes and strong lips can fight each other unless they’re working as a team. Think proportion and placement. If your eyes carry the drama, go clean or sculpted on the lips. If you’re dialing up the mouth with a bold contour or neon gloss, consider soft focus on the lids.
(For more on pairing looks with precision, check out Mastering the Art of Lip Contouring.)
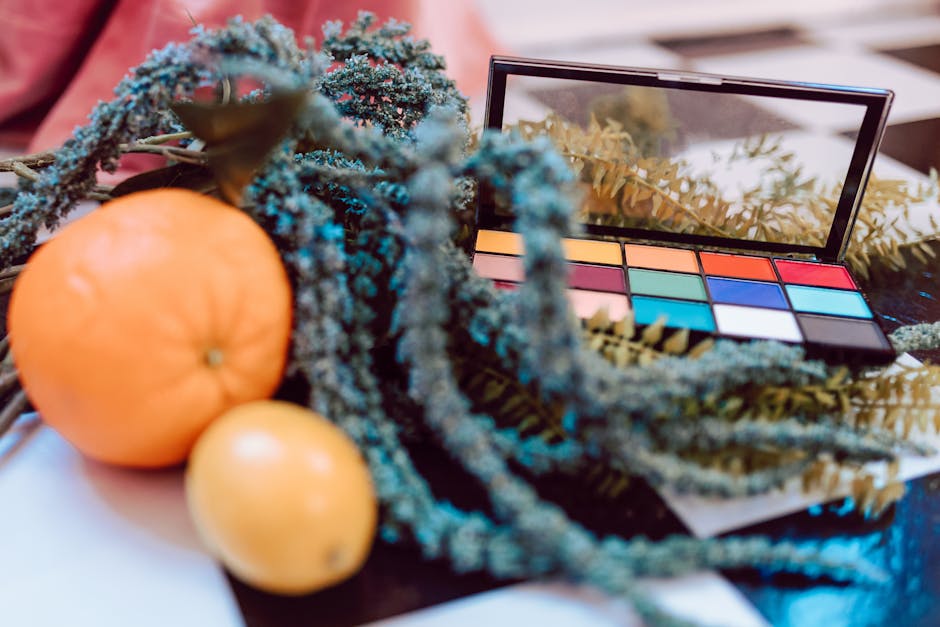
Primer: The Non-Negotiable Base
If you’re skipping eye primer, you’re cutting corners. Every solid eye look—no matter how minimal or dramatic—starts right here. Primer grips pigment to the lid, smooths uneven texture, and keeps shadows from sliding off by noon. Without it, even the best shadows lose their edge fast.
Primer isn’t just insurance—it’s performance. It makes colors pop truer, blend smoother, and last longer. That buttery transition your favorite beauty vlogger showcases? Primer helped. That crease-free shimmer still looking fresh at happy hour? Again: primer.
But it’s not one-size-fits-all. Oily lids need a matte, budge-proof formula to control slip. Dry lids benefit from a hydrating, flexible base that won’t flake. Mature lids? Go for something lightweight and smoothing—nothing that settles into fine lines.
Bottom line: primer is skincare-meets-strategy for your eye makeup. If you want to build anything that lasts, start with a solid foundation.
Building a Flawless Blend
Blending isn’t fancy—it’s fundamentals. Start with matte neutrals when learning to blend. They’re more forgiving and build cleaner transitions from one shade to the next. Think taupes, soft browns, muted terracottas. Apply a light shade close to your skin tone all over the lid first. That’s your canvas. Then move gradually into deeper tones, starting in the crease and outer corner, using a soft sweeping motion. No pressing. No swirling. Think windshield wiper, not washing machine.
Brushes matter—a lot more than most people think. Three kinds you’ll want in easy reach: a crease brush (fluffy and tapered for precise diffusing), a flat shader (firm enough to pack color onto the lid), and a blending brush (your clean, soft blender to soften harsh edges). Each does a job. Don’t use one brush for everything unless you’re going for mud.
When layering from light to dark, patience wins. Don’t dump the darkest shade straight in. Build in stages, checking how things look as you go. This helps you keep control and adjust if one side goes rogue. The result? Depth without drama, unless you want it. Flawless isn’t perfect—it’s well thought-out and balanced.
Defining the Crease
Defining the crease changes everything. It carves structure into the eye, adds depth, and gives you control over how light and shadow move across your lids. Whether you’re building a natural look or a dramatic one, crease work acts as the blueprint. Skip it, and the rest of the look can fall flat.
That said, not all eyes benefit from the same technique. For hooded eyes, raise the crease above the natural fold to make the lid space look bigger. Stick to matte shades here—shimmer emphasizes texture. Monolids benefit from soft gradient blending above the lash line, sweeping upward with transition shades to fake a crease. For deep-set eyes, less is more. Keep the crease light and focused in the outer third to avoid looking overly shadowed.
Shadow mapping helps take out the guesswork. Start with a transition shade in the upper crease area to create a diffused base—use a fluffy brush for wide strokes. The contour shade goes directly into the crease in a tighter motion for real depth—this one needs a smaller dome brush. Then, add a highlight shade under the brow bone or just above the crease to open up the eye. Where and how you place each makes the difference between a seamless look and one that feels off.
Nail the crease, and everything else falls in line.
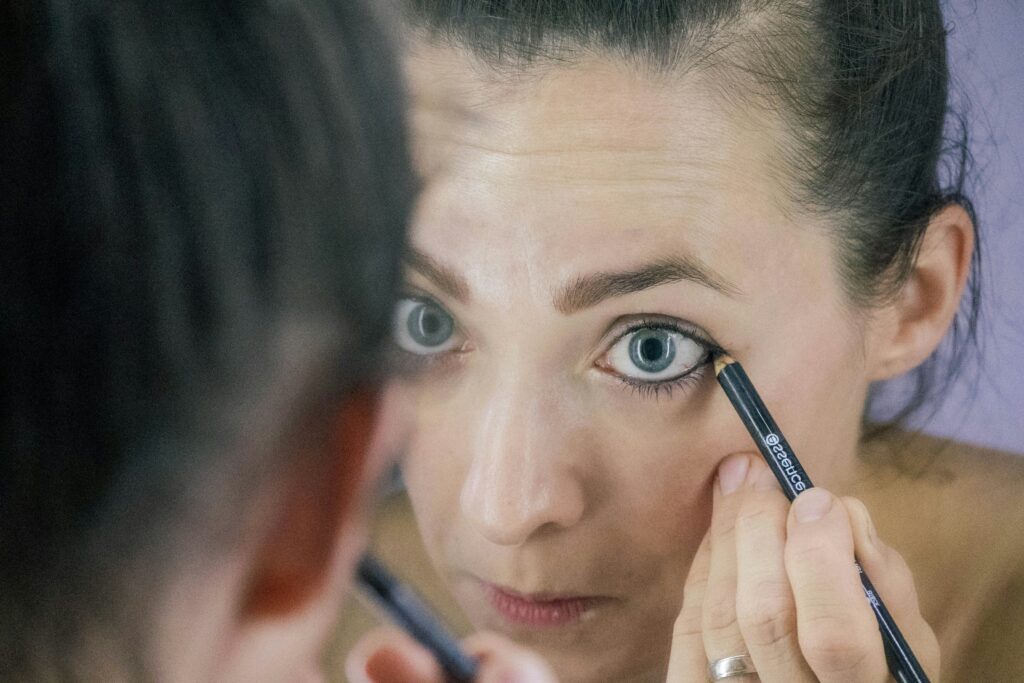
Perfecting the Wing
The winged liner isn’t just for dramatic looks anymore. It’s a small stroke with big impact—a tiny lift at the outer corner can subtly elongate the eye, while a bold flick turns heads. The key? Knowing what you’re going for. Want a clean lift for everyday wear? Keep the angle shallow and close to the lash line. Going full statement mode? Dial up the angle, sharpen the edge, and let it lead the entire look.
Choosing the right tool matters. Pencils are forgiving—great for soft, smoky wings or beginners who need time to build shape. Gel liners bring precision with a bit more slip, ideal for those who want richness without the pressure of a liquid. Liquid liners? That’s precision for the brave. When you want sharp definition and drama, reach for it. But make sure the formula isn’t runny—it should dry fast, stay put, and not flake.
Symmetry’s the struggle. Here’s the fix: map both sides first with small dots to outline your angle before you commit to the full swipe. Use a pointed cotton swab with a bit of micellar water for crisp corrections. And if one wing flies higher? Lift your chin. Check your brows. Sometimes it’s not the wing—it’s the frame.
Mastering the wing is mostly reps. Start with soft flicks and build your confidence. It’s a learned muscle, not a miracle.
Smudging for Soft Drama
The Smokey Line: Effortless, Lived-In Definition
The smokey liner look has evolved far beyond its edgy, rock-inspired origins. Today, it serves as a go-to for adding subtle drama with minimal effort. Perfect for days when precision isn’t the priority, this technique embraces softness and imperfection.
- Use a creamy pencil liner to sketch along the upper and/or lower lash line
- Immediately smudge it out with a dense, small brush or fingertip
- Layer a coordinating shadow over the liner to intensify the blurred effect and set it in place
Transitioning from Day to Night
With the right approach, a daytime smudge can easily shift into deeper, evening-ready glam. The key is building in layers without starting over.
To level up the look:
- Deepen the shadow or liner shade after work hours
- Add a darker matte or shimmer shadow to the outer corner
- Tightline the upper waterline to boost intensity without hard lining
This quick refresh doesn’t require a full redo—just a few tweaks and strategic re-blending.
Universally Flattering Shades
Not every shade works for every skin tone, but some colors are shockingly versatile.
Try these universally glowing picks:
- Soft brown or taupe for lighter skin tones
- Rich copper or bronze for medium and olive tones
- Charcoal or deep plum for deeper complexions
These shades offer depth and drama without overwhelming the eye, and they blend beautifully across skin tones.
Pro Tip: A little shimmer in the smudge can elevate the look—just keep it subtle for daytime and amp it up for evening.
Creating Dimension with Highlight and Contrast
If your eye look feels flat, you’re probably missing two simple but powerful steps: strategic highlight and color contrast. The fastest way to add lift and brightness? Tap a bit of shimmer or a pale matte shade on two key spots—the inner corner and under the highest point of your brow arch. These accents catch light and immediately make the eyes look more open and awake. Shimmer adds glow, matte gives lift without sparkle—use based on the effect you want.
Highlight placement matters. Keep product tight to the areas you want to emphasize. Too far out and you lose definition. Use a small detail brush or even your pinky finger for precision. This isn’t full-face drama—it’s targeted, clean, and keeps your eye shape sharp.
For extra depth and eye color pop, build in contrast. Basic rule: use shades that oppose your natural eye tone. Blue eyes? Warm bronzes, copper, and peachy rusts bring them forward. Green or hazel eyes stand out with plums, burgundy, and soft red-browns. Brown eyes are flexible—try navy, emerald, or even bold gold to add dimension. You’re not changing your whole palette—just anchoring your look with one shade that turns the volume up on your natural color.
Done right, contrast and highlight add polish without looking overworked. Small changes, big payoff.
Lashes: Underrated Game-Changer
Mascara isn’t just swipe-and-go—it’s a sequence. First, curl. Without that initial bend, even the lengthiest lashes fall flat. A quick clamp at the base (and maybe a second toward the tip) makes the difference between tired and wide awake. Next comes primer. It’s your grip coat. Adds heft, holds curl, and gives mascara something to cling to. Last, layer up. Mascara should start at the root and wiggle up. One coat defines, two adds volume, three is red carpet—if your formula can handle it without clumping. Spoiler: not all do.
False lashes? Think of them like tools in a box. Strip lashes bring full drama fast—ideal for events or content shoots. Clusters = control. You place them strategically. More natural, more adjustable. Individuals? Best for subtle build, especially on camera. Takes longer, but looks the most like you—just enhanced. Use them when you want compliments without the guessing game.
And underneath it all: your real lashes matter. Go easy on the tugging during removal. Use a cleanser that breaks down glue or waterproof formulas (coconut oil works in a pinch). A lash serum helps if you’re dealing with breakage. Beauty’s fun, but healthy lashes make the glam sustainable.
Final Tips: Customizing for Occasion and Style
The difference between soft glam and bold editorial isn’t as dramatic as you’d think—it comes down to control. A diffused brown lid with clean mascara? That’s soft glam. Crank up the saturation, define the crease with intention, and play with shape or color contrast—and now you’ve stepped into editorial territory. It’s fewer steps than people assume, just executed with precision.
Your capsule eye kit should work harder, not bigger. You need: a solid primer, one matte neutral transition shade, one darker contour color, a shimmer or highlight tone, a solid black or brown liner (gel or pencil), an eyelash curler, a versatile mascara, and one brush trio—crease, flat shader, and a blender. Maybe add a pop shade for fun.
When time’s tight, nail a 5-minute eye: primer, one matte blended across the lid, curl lashes, mascara, done. Want full glam? Give yourself 25 minutes: blend out your transition and contour into a defined shape, deepen your outer corner, add shimmer or metallic to the center lid, tightline with eyeliner, possibly add lashes, and buff everything smooth. Layered doesn’t mean cakey—it means thought-out. Glam, but smart.
Conclusion: Practice, Play, Perfect
Embrace Experimentation
Eye makeup isn’t about always getting it right — it’s about exploring your creativity and finding what makes your features stand out. Give yourself permission to try new techniques, whether it’s a bold wing or an unexpected color combo. Mistakes? They’re just part of the learning curve.
- Don’t aim for perfection every time
- Try different looks, even if they’re outside your comfort zone
- Use practice as a way to build confidence and skill
Eye Makeup as Confidence Fuel
Well-executed eye makeup can instantly transform your mood and send a message — whether it’s sharp and professional, soft and romantic, or bold and expressive.
- Enhances your natural features
- Can visually lift, define, or open the eyes
- Offers a tool for mood-based self-expression
Harmonize with the Rest of Your Face
A standout eye look can only improve when it’s balanced with complementary lip shaping and color. Creating harmony between eyes and lips completes your overall aesthetic and gives your makeup intention.
- Pair bold eyes with more neutral lips (and vice versa) for balance
- Match undertones across the face for cohesion
- Know when to let one feature take the spotlight
For more on pairing bold eyes with sculpted lips, don’t miss: Mastering the Art of Lip Contouring